Achieve Energy Independence: DIY Solar, Wind, and Alternative Energy Solutions
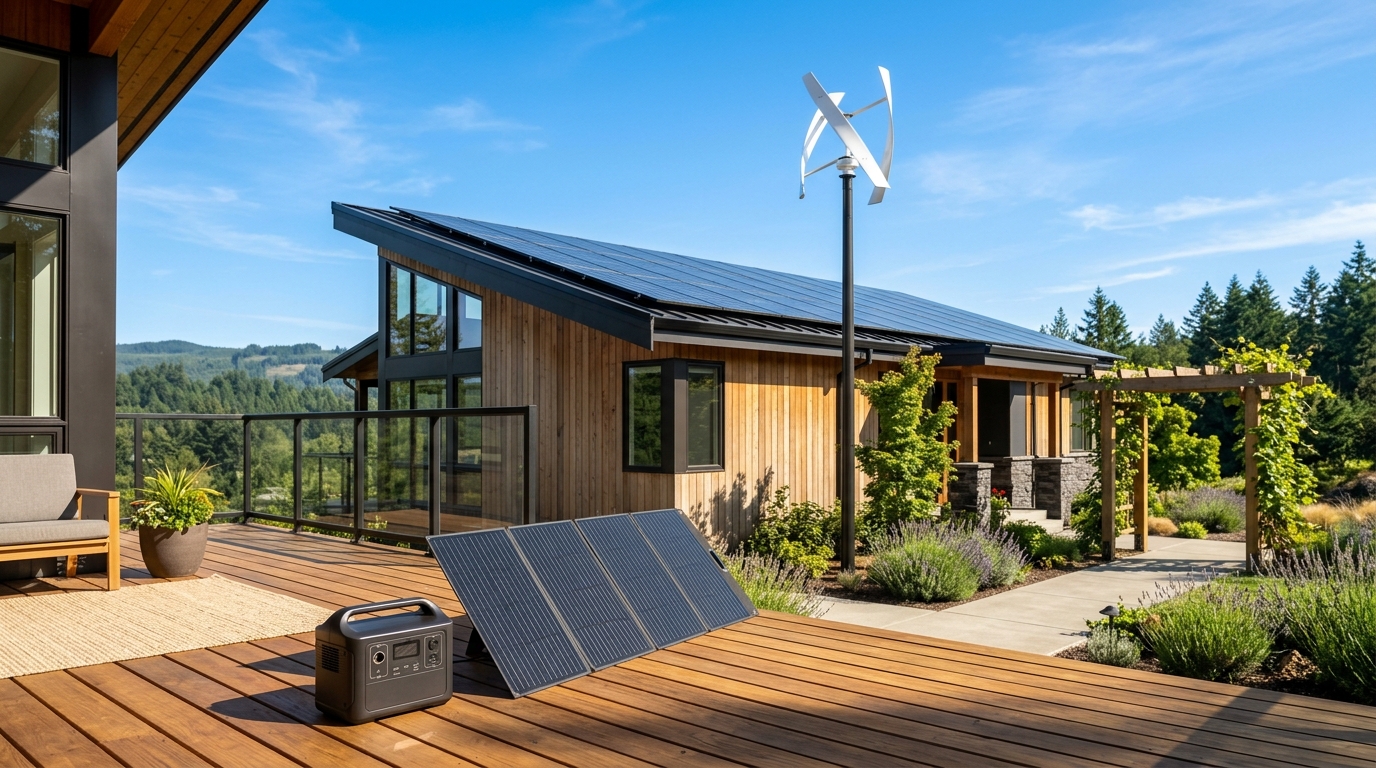
Combining photovoltaic panels, micro wind turbines, and modern lithium storage provides a resilient bridge to true electrical independence.
By WattDweller Editorial Team · Updated October 17, 2026
For more than a century, households operated under an unspoken societal contract with centralized electric utilities. You plugged your appliances into the wall, flipped light switches without second thought, and paid whatever monthly invoice arrived in your mailbox.
In recent years, that traditional arrangement has begun to fray. Rapidly escalating utility rates, aging regional transmission lines, severe climate anomalies, and rolling grid curtailments have made electricity more expensive and less reliable than at any point in modern memory.
At the same time, a quiet technological revolution has unfolded. Photovoltaic solar cells have plunged in cost while soaring in conversion efficiency. Compact micro wind turbines now capture turbulent residential breezes. Modular Lithium Iron Phosphate (LiFePO4) batteries provide safe, maintenance-free energy storage right inside living spaces.
The concept of energy independence is no longer reserved for wealthy homeowners spending fifty thousand dollars on commercial rooftop contracts or survivalists living in remote mountain cabins. Today, anyone can take tangible, scalable steps toward self-reliance. Whether you install a single folding solar panel on an apartment patio, build a standalone off-grid solar generator for a workshop shed, or construct a hybrid solar-wind microgrid for whole-home emergency security, generating your own clean kilowatt-hours has never been more achievable.
This comprehensive guide serves as the foundational pillar for our Green Energy and Independence series. Below, we break down the engineering fundamentals of residential solar and wind systems, provide clear calculations for component sizing, review battle-tested hardware, and walk you through building a safe, productive alternative energy setup from the ground up.
For our complementary guides on optimizing household power and securing blackout protection, explore our companion pillars: The Ultimate Guide to Smart Plugs: Automate, Save Energy, and Lower Your Bills and Portable Power Stations: The Complete Buyer’s Guide for Home Backup and Off-Grid Living.
The Three Tiers of DIY Energy Independence
Before buying solar panels or mounting hardware, you must clearly define your operational objective. Generating alternative energy generally falls into three distinct tiers:
+--------------------------------------------------------------------------+
|                       THE ENERGY INDEPENDENCE SPECTRUM                   |
|                                                                          |
|  [TIER 1: PORTABLE & BALCONY MICRO-GENERATION] (100W to 400W)            |
|  - Renter-friendly, zero permits, folding panels, portable power packs   |
|  - Powers laptops, phones, emergency lights, medical CPAP equipment      |
|                                                                          |
|  [TIER 2: DEDICATED OFF-GRID CIRCUIT / SHED SYSTEM] (400W to 1,200W)     |
|  - Rigid solar panels, MPPT charge controller, 12V/24V LiFePO4 battery   |
|  - Powers full-size refrigerators, home office setups, power tools       |
|                                                                          |
|  [TIER 3: HYBRID RESIDENTIAL MICROGRID] (1,500W to 4,000W+)             |
|  - Multi-panel rooftop/ground array, micro wind turbine, 48V storage     |
|  - Delivers multi-day off-grid resilience for critical household loads   |
+--------------------------------------------------------------------------+
Tier 1: Portable and Balcony Micro-Generation (100W to 400W)
- Target Audience: Apartment dwellers, suburban renters, weekend campers, and emergency preppers seeking mobile disaster insurance.
- Core Hardware: Lightweight folding monocrystalline panels paired directly with an all-in-one portable power station.
- Installation Requirements: Zero tools, zero wiring, zero landlord permission. Panels deploy on a sunny patio, lawn, or balcony railing in two minutes and pack away into a closet when finished.
Tier 2: Dedicated Off-Grid Circuit or Shed System (400W to 1,200W)
- Target Audience: Homeowners, remote cabin owners, workshop enthusiasts, and families preparing for multi-day grid disruptions.
- Core Hardware: Two to six rigid monocrystalline panels mounted on a roof or ground rack, a high-efficiency MPPT charge controller, a standalone pure sine wave inverter, and a 100Ah to 200Ah lithium battery bank.
- Installation Requirements: Basic electrical hand tools, inline DC fuses, proper wire gauge selection, and safe battery containment. Powers dedicated high-priority circuits like refrigeration and lighting indefinitely without utility connection.
Tier 3: Hybrid Solar and Wind Microgrid (1,500W to 4,000W+)
- Target Audience: Rural properties, homesteaders, and suburban households seeking substantial grid defection and true utility autonomy.
- Core Hardware: Large solar array, a 400W to 1,000W residential micro wind turbine, hybrid charge controllers, and 48-volt expandable server rack lithium battery banks.
- Installation Requirements: Structural mounting, lightning grounding rods, balance-of-system safety disconnects, and transfer switches. Provides continuous multi-season electrical power through sun, rain, and winter storms.
The Solar Foundation: Understanding Photovoltaic Mechanics
Solar photovoltaics represent the most reliable and maintenance-free alternative energy technology available to private individuals. Solid-state silicon wafers absorb sunlight and release electrons through the photovoltaic effect, generating silent direct current (DC) electricity with zero moving parts.
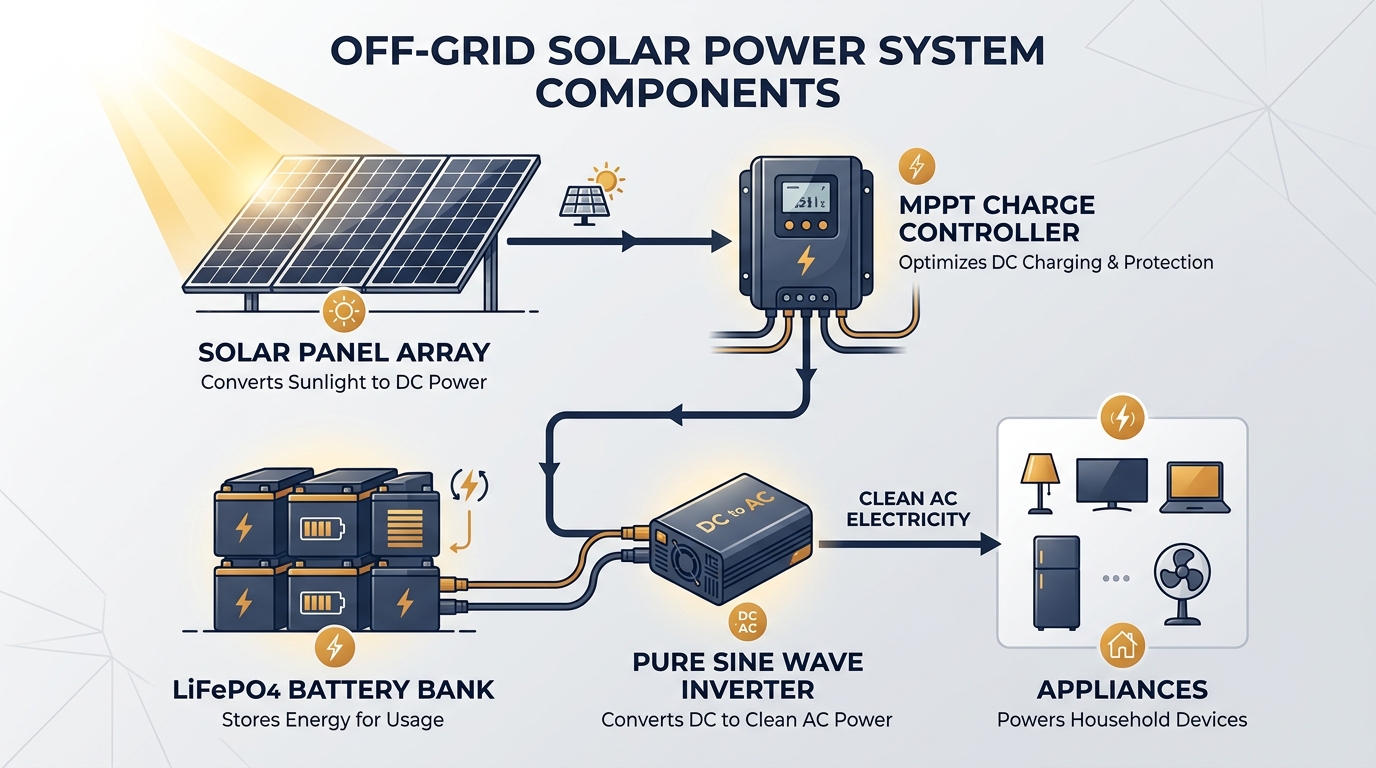
Understanding electrical system components ensures your solar panels, charge controllers, and batteries operate in harmony.
1. Monocrystalline vs. Polycrystalline vs. Flexible Solar Panels
Not all solar panels deliver the same performance under real-world weather conditions. Choosing the right panel construction determines your system footprint and energy harvest:
| Specification | Monocrystalline (Mono) | Polycrystalline (Poly) | Flexible Thin-Film |
|---|---|---|---|
| Cell Construction | Single pure silicon crystal structure | Melted fragments of multiple silicon crystals | Thin photovoltaic layer on flexible polymer |
| Efficiency Rating | 21% to 24% | 15% to 18% | 12% to 16% |
| Aesthetic Appearance | Sleek uniform black | Speckled marbled blue | Thin curved dark profile |
| Heat Degradation | Low (-0.35% per degree C above 25°C) | Higher (-0.42% per degree C above 25°C) | Moderate |
| Durability & Lifespan | 25+ years (Tempered glass + aluminum) | 20 to 25 years | 5 to 10 years (Vulnerable to delamination) |
| Best Application | Rooftops, ground arrays, maximum space efficiency | Budget-constrained ground mounts | Curved RV roofs, boat biminis, lightweight carry |
💡 Key Takeaway: For any permanent or semi-permanent installation, always choose monocrystalline panels. Their superior efficiency extracts twenty to thirty percent more electricity from the exact same physical surface area, which is vital when space on balconies, patios, or rooflines is constrained.
2. Peak Sun Hours: Why 8 Hours of Daylight Does Not Mean 8 Hours of Power
One of the most frequent misconceptions in renewable energy planning is confusing daylight hours with peak sun hours.
The sun rises, travels across the sky, and sets. When the sun is low on the horizon during early morning and late afternoon, its light rays travel through thick atmospheric layers at acute angles, delivering only a fraction of their potential energy.
According to data compiled by the National Renewable Energy Laboratory (NREL), a Peak Sun Hour is defined as one hour in which solar solar irradiance averages 1,000 watts per square meter on a surface oriented perpendicular to the sun:
- Most regions in North America and temperate global zones receive between 3.5 and 5.5 Peak Sun Hours per day on average across the year.
- Sun-drenched desert environments (like Arizona or southern Spain) reach 6.0 to 7.0 Peak Sun Hours.
- Cloudier northern climates (like the Pacific Northwest or Northern Europe) may average 2.5 to 3.5 Peak Sun Hours in winter months.
+--------------------------------------------------------------------------+
|                  DAILY SOLAR HARVEST CALCULATION FORMULA                 |
|                                                                          |
|   Daily Energy (Watt-Hours) = Array Watts x Peak Sun Hours x 0.78 (Losses)|
|                                                                          |
|   Example with a 200W Array in an area with 4.5 Peak Sun Hours:          |
|   Daily Energy = 200W x 4.5 hours x 0.78 = 702 Watt-Hours per day        |
+--------------------------------------------------------------------------+
Notice the 0.78 environmental derating factor in the calculation above. Real-world solar arrays lose approximately twenty to twenty-five percent of theoretical laboratory performance due to dust accumulation on glass surfaces, panel heating on hot summer afternoons, wire resistance, and minor atmospheric haze.
The Brain of the System: PWM vs. MPPT Charge Controllers
Solar panels output fluctuating direct current voltages that swing dramatically depending on cloud cover and ambient temperature. A 100-watt panel rated for 12-volt battery charging actually produces an open circuit voltage between 18 volts and 22 volts.
Connecting a solar panel directly to a battery without an intermediary regulator will boil the battery electrolyte, destroy internal lithium protection circuits, and create an extreme fire hazard. The charge controller sits between the solar array and the battery bank, precisely stepping down high panel voltages to the exact absorption and float voltages demanded by the battery cells.
[Solar Panel Array: 18V to 45V DC] ──> [MPPT Charge Controller] ──> [Battery Bank: 12V / 24V DC]
                                                │
                                                ▼ (Digital DC Output)
                                    [Pure Sine Wave Inverter] ──> [120V AC Household Loads]
Pulse Width Modulation (PWM) vs. Maximum Power Point Tracking (MPPT)
Two primary controller topologies exist on the market:
1. PWM (Pulse Width Modulation) Controllers
A PWM controller acts as a basic electronic on-and-off switch. When connected, it physically forces the solar panel operating voltage down to match the current battery voltage.
- If your solar panel outputs 19 volts at 5.5 amps, and your battery sits at 12.5 volts, the PWM controller drags the panel down to 12.5 volts while maintaining 5.5 amps.
- The remaining 6.5 volts of potential electrical energy is completely discarded as heat.
- Efficiency: 70% to 75%.
- Best Used For: Low-budget hobby setups under 100 watts where equipment cost is the primary factor.
2. MPPT (Maximum Power Point Tracking) Controllers
An MPPT controller acts as a sophisticated, high-speed DC-to-DC digital power transformer. Its internal microprocessor sweeps the solar panel electrical curve hundreds of times per second, finding the exact voltage and current combination that yields the highest total wattage.
- It absorbs the full 19 volts at 5.5 amps (104.5 watts) from the panel, digitally converts the electricity down to the battery required 12.8 volts, and increases the charging current to 8.1 amps.
- You lose almost zero energy.
- Efficiency: 95% to 99%.
- Best Used For: Any serious residential, shed, or emergency system with 150 watts or more of solar input.
⚡ Performance In The Cold: MPPT controllers deliver their most dramatic advantages during cold, clear winter months. When ambient temperatures drop, solar panel voltage spikes significantly. A PWM controller throws all that extra voltage away, whereas an MPPT controller captures every cold-weather volt and converts it into valuable charging amperes.
Energy Storage: Sizing and Selecting the Battery Bank
Generating alternative energy during the day solves only half of the resilience puzzle. When the sun dips below the horizon or wind speeds drop to a gentle calm, your home relies entirely on energy stored within your battery bank.
+-------------------------------------------------------------------------------+
|             BATTERY CHEMISTRY COMPARISON FOR GREEN ENERGY STORAGE             |
+------------------------+---------------------+--------------------------------+
| Characteristic         | Modern LiFePO4      | Traditional Lead-Acid (AGM/Gel)|
+------------------------+---------------------+--------------------------------+
| Usable Depth of Discharge| 80% to 100%       | 50% Maximum (To avoid damage)  |
| Cycle Life Expectancy  | 3,000 to 5,000 Cycles| 400 to 600 Cycles             |
| Operating Lifespan     | 10 to 15+ Years     | 2 to 4 Years                   |
| Weight for 1.2kWh Store| 24 to 28 pounds     | 65 to 75 pounds                |
| Toxic Fumes / Outgassing| Zero (Safe indoors)| Hydrogen gas risk if vented    |
| Round-Trip Efficiency  | 95% to 98%          | 75% to 82%                     |
+------------------------+---------------------+--------------------------------+
Why Lithium Iron Phosphate (LiFePO4) Is Mandatory
For decades, off-grid systems utilized heavy lead-acid, flooded marine, or AGM sealed batteries. Today, choosing lead-acid for a new alternative energy installation is a severe financial and operational error.
To obtain 1,200 watt-hours of usable energy from a traditional lead-acid bank, you must purchase a massive 2,400 watt-hour battery, because draining lead-acid past fifty percent destroys the internal lead plates through severe sulfation. In contrast, a 1,200 watt-hour LiFePO4 battery delivers one hundred percent of its stored energy without degradation.
Furthermore, LiFePO4 cells do not outgas explosive hydrogen during rapid charging, produce zero corrosive acid vapors, and weigh less than half of equivalent lead-acid blocks.
The All-in-One Alternative: Integrating Portable Power Stations
If building a custom battery bank with separate busbars, inline shunts, fuse blocks, and external inverters feels daunting, modern portable power stations serve as ideal plug-and-play solar storage hubs.
Units like the EcoFlow DELTA 2 or Anker SOLIX C1000 house their own internal LiFePO4 battery, integrated MPPT solar charge controller, and pure sine wave inverter in a single protective shell. You simply plug your solar panels directly into the rear DC input port using an MC4-to-XT60 cable, and you immediately possess a fully functional, mobile solar generator.
For full technical specifications on turnkey battery generators, consult our comprehensive review: Portable Power Stations: The Complete Buyer’s Guide for Home Backup and Off-Grid Living.
Harnessing the Wind: Residential Micro Wind Turbines
Solar power delivers steady, dependable energy across sunny summer afternoons, but what happens during three-day winter blizzards, autumnal nor’easters, or dark rainy nights? This is where residential micro wind generation becomes an indispensable asset.
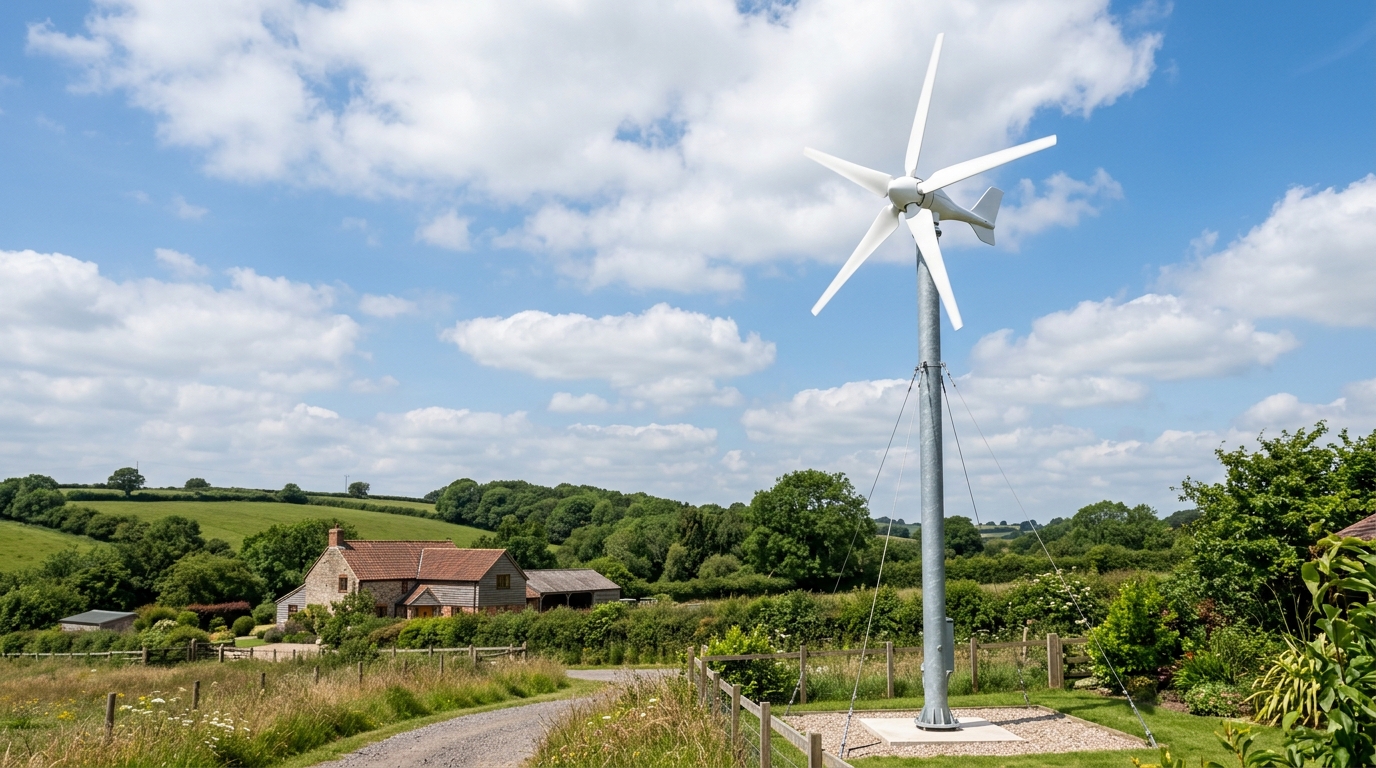
Pairing solar panels with micro wind turbines creates a complementary hybrid microgrid that generates power day and night across all four seasons.
The Physics of Wind Power: The Velocity Cubed Rule
Harnessing wind energy requires understanding a fundamental law of fluid dynamics. The power available in the wind is proportional to the cube of its velocity ($P \propto V^3$):
- If wind speed doubles from 5 miles per hour to 10 miles per hour, the potential electrical energy available in that wind increases by a factor of eight ($2^3 = 8$).
- If wind speed triples from 5 MPH to 15 MPH, the energy content surges by a factor of twenty-seven ($3^3 = 27$).
Because of this cubic relationship, wind turbines produce negligible power in light breezes. Every turbine features three critical speed thresholds:
- Cut-in Speed (Typically 4.5 to 6.5 MPH): The speed at which the blades begin spinning and generating initial trickle current.
- Rated Speed (Typically 22 to 28 MPH): The wind velocity required for the generator to output its full advertised wattage (e.g., 400W).
- Cut-out / Braking Speed (Typically 35 to 45 MPH): The safety threshold where internal aerodynamic or electromagnetic dump brakes engage to prevent mechanical damage during severe gales.
Horizontal Axis (HAWT) vs. Vertical Axis (VAWT) Turbines
- Horizontal Axis (Traditional Propeller Style): Features high aerodynamic efficiency (typically 35% to 45% Betz limit harvest). Must pivot on a yaw bearing to track wind direction. Best mounted on open rural land, coastal bluff edges, or elevated masts clear of tree lines.
- Vertical Axis (Savonius or Darrieus Helical Style): Omnidirectional; captures wind blowing from any compass heading without pivoting. Handles gusty, turbulent urban winds gracefully with quiet operation, but operates at lower overall aerodynamic efficiency (15% to 25%).
+--------------------------------------------------------------------------+
|                 THE SOLAR AND WIND COMPLEMENTARY CYCLE                   |
|                                                                          |
|  SUMMER MONTHS:  High Solar Insolation (70%)  +  Gentle Summer Winds (30%)|
|  WINTER MONTHS:  Low Solar Insolation (25%)   +  Strong Winter Storms (75%)|
|  DAYTIME:        Direct Photovoltaic Peak     +  Variable Thermal Breezes |
|  NIGHTTIME:      Zero Solar Output            +  Steady Nocturnal Winds   |
+--------------------------------------------------------------------------+
As demonstrated in the seasonal matrix above, solar and wind represent the ultimate natural partnership. When bad weather blocks the sun, storm front barometric pressure differentials produce strong gusts, keeping your battery bank charged while solar panels sit dormant.
Top Tested Hardware for DIY Alternative Energy
Based on real-world testing, component durability, and ease of deployment, these three hardware selections provide the most dependable building blocks for your energy independence journey:
1. Best Complete Solar Starter Kit: Renogy 100 Watt 12V Starter Kit
Renogy 100 Watt 12 Volt Solar Starter Kit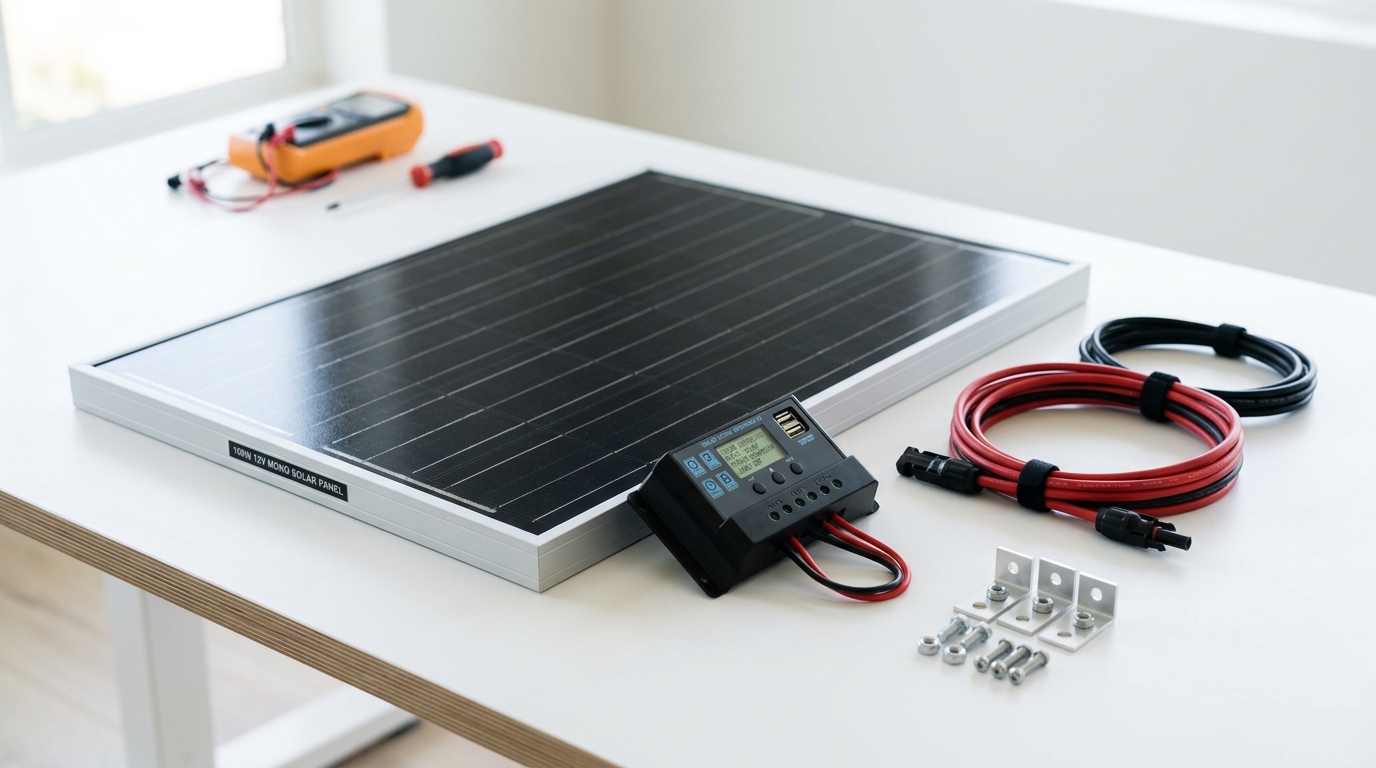
The Renogy 100W starter kit provides everything required to build your first independent off-grid electrical circuit.
For beginners stepping into solar energy, the Renogy 100 Watt Starter Kit is the gold standard educational and practical package. It includes a high-efficiency Grade-A monocrystalline solar panel, an intuitive 30A PWM charge controller equipped with an informative LCD screen, heavy-duty Z-bracket mounting hardware, and all necessary adapter cables.
The corrosion-resistant aluminum frame handles heavy snow loads up to 5,400 Pascals and high-wind loads up to 2,400 Pascals. Connecting this single panel to a 50Ah or 100Ah lithium battery creates an independent power hub capable of running 12-volt LED lighting, recharging smartphones and laptops, and operating communication radios during grid blackouts.
As your power requirements expand, the included 30-amp controller supports up to 400 watts of solar input, allowing you to simply connect three additional panels in parallel without replacing the charge controller.
- Panel Rating: 100 Watts Monocrystalline
- Open Circuit Voltage (Voc): 21.6 Volts
- Charge Controller: 30A with digital LCD telemetry
- Weight: 14.1 pounds
- Key Strengths: Complete out-of-the-box system, expandable up to 400W, proven weatherproofing
2. Best Portable High-Efficiency Panel: Renogy 200 Watt Portable Monocrystalline Solar Panel
Renogy 200 Watt Portable Monocrystalline Solar PanelIf you live in a rental property, travel in an RV, or need maximum solar wattage without drilling permanent holes in your roof, this 200-watt portable folding panel is a technological tour de force.
Featuring premium N-Type monocrystalline solar cells with an industry-leading conversion efficiency exceeding twenty-three percent, this panel folds like a compact suitcase with heavy-duty carrying handles and built-in adjustable kickstand legs. The kickstands allow you to angle the panel toward the sun at twenty, thirty, or forty-five degrees throughout the day, extracting up to thirty percent more daily energy than flat-mounted panels.
Equipped with standard MC4 waterproof connectors, it plugs directly into portable power stations, marine battery boxes, and off-grid charge controllers. During a full day of sunshine, this single folding panel captures 800 to 1,100 watt-hours of fresh energy, enough to replenish a full-sized portable power station like the EcoFlow DELTA 2 from dawn to dusk.
- Rated Wattage: 200 Watts
- Cell Type: High-efficiency N-Type Monocrystalline (23%+ efficiency)
- Form Factor: Folding suitcase design with integrated kickstands
- Weight: 26.5 pounds
- Key Strengths: Zero-installation portability, adjustable sun angles, rugged protective case
3. Best Entry-Level Micro Wind Generator: Pikasola 400W 12V Wind Turbine
Pikasola 400W 12V Wind Turbine Generator KitFor property owners with steady seasonal breezes, the Pikasola 400W Wind Turbine provides an exciting, affordable entry into kinetic alternative energy.
The unit features a precision-cast three-phase permanent magnet synchronous generator housed inside a die-cast aluminum alloy shell with weather-resistant anti-corrosion coating. Its three aerodynamic fiberglass-reinforced nylon blades are optimized for quiet rotation and low startup inertia, allowing the turbine to begin spinning at wind speeds as low as 5.6 miles per hour.
The kit includes a dedicated hybrid-compatible wind charge controller that converts three-phase AC turbine electricity into regulated 12-volt DC battery power. It features automatic electromagnetic over-speed braking that engages during violent storm gusts to protect the rotor assembly.
When paired in parallel with a solar array, the Pikasola 400W turbine ensures your home battery bank continues absorbing charge overnight and through stormy weather when solar panels sit idle.
- Rated Power Output: 400 Watts (at 28 MPH wind speed)
- Start-up Wind Velocity: 5.6 MPH (2.5 m/s)
- Blades: 3 High-Strength Nylon Fiber blades (47-inch rotor diameter)
- Generator Type: 3-Phase Permanent Magnet AC Synchronous
- Weight: 17.6 pounds
- Key Strengths: Low startup wind speed, integrated charge controller, automatic storm braking
Step-by-Step DIY Build: Wiring a Safe Solar and Battery System
Building your own off-grid alternative energy system is exceptionally rewarding, but working with direct current requires meticulous adherence to safety standards. Unlike residential alternating current that alternates sixty times per second, direct current does not cross a natural zero-voltage point, making DC electrical arcs much harder to extinguish if a short circuit occurs.
Follow this standard installation sequence per National Electrical Code (NEC Article 690) guidelines:
[STEP 1: CONNECT BATTERY TO CONTROLLER] (Controller senses 12V/24V system voltage)
                 │
                 ▼
[STEP 2: CONNECT SOLAR PANELS TO CONTROLLER] (Controller safely regulates PV input)
                 │
                 ▼
[STEP 3: CONNECT INVERTER DIRECTLY TO BATTERY] (Never connect high-draw inverters to controller load ports!)
Critical Rule: The Mandatory Connection Sequence
Never connect solar panels to a charge controller before the charge controller is connected to the battery bank:
- Connect Battery First: When you attach the battery cables to the controller, the controller boots up, reads the battery terminal voltage, and determines whether the system operates at 12 volts, 24 volts, or 48 volts. It establishes internal regulation parameters.
- Connect Solar Panels Second: Once the controller is fully booted, uncover your solar panels and connect the positive and negative MC4 leads to the controller PV terminals. The controller immediately begins stepping down panel voltage to charge the battery safely.
- Connect Inverter Directly to Battery Terminals: Never connect a 120V AC inverter to the small auxiliary load terminals on a charge controller. Those auxiliary ports are rated for minor 12V LED lights (5 to 10 amps). An inverter drawing 1,000 watts pulls over 80 amps from a 12-volt battery, which will vaporize the internal circuit traces of a charge controller. Inverters must always connect directly to the main battery terminals through an appropriately rated inline fuse.
+--------------------------------------------------------------------------+
|                  RECOMMENDED WIRE GAUGE (AWG) SELECTION CHART            |
|                  (Based on 12V DC System with 3% Maximum Voltage Drop)   |
|                                                                          |
|  Current (Amps)     0 to 5 Feet         5 to 10 Feet      10 to 15 Feet  |
|  ----------------------------------------------------------------------  |
|  10 Amps (100W PV)  14 AWG              12 AWG            10 AWG         |
|  20 Amps (200W PV)  12 AWG              10 AWG             8 AWG         |
|  30 Amps (300W PV)  10 AWG               8 AWG             6 AWG         |
|  100 Amps (1kW Inv)  4 AWG               2 AWG             1/0 AWG       |
+--------------------------------------------------------------------------+
Installing Inline Circuit Protection
Every positive conductor running from your battery bank must include a physical fuse or DC-rated circuit breaker positioned within seven inches of the battery terminal.
If an accidental tool drop, rodent bite, or vibration-induced chaffing grounds a positive cable against a metal enclosure, an unfused lithium battery can release thousands of amperes in milliseconds, melting copper cables and starting an electrical fire. Installing a Class-T or ANL fuse sized twenty-five percent above your maximum continuous operating current guarantees immediate disconnection if a catastrophic short occurs.
4 Strategic Methods to Maximize Green Energy Harvest
Whether you operate a 100-watt balcony panel or a multi-kilowatt off-grid hybrid array, practicing strategic energy management dramatically increases your net generation:
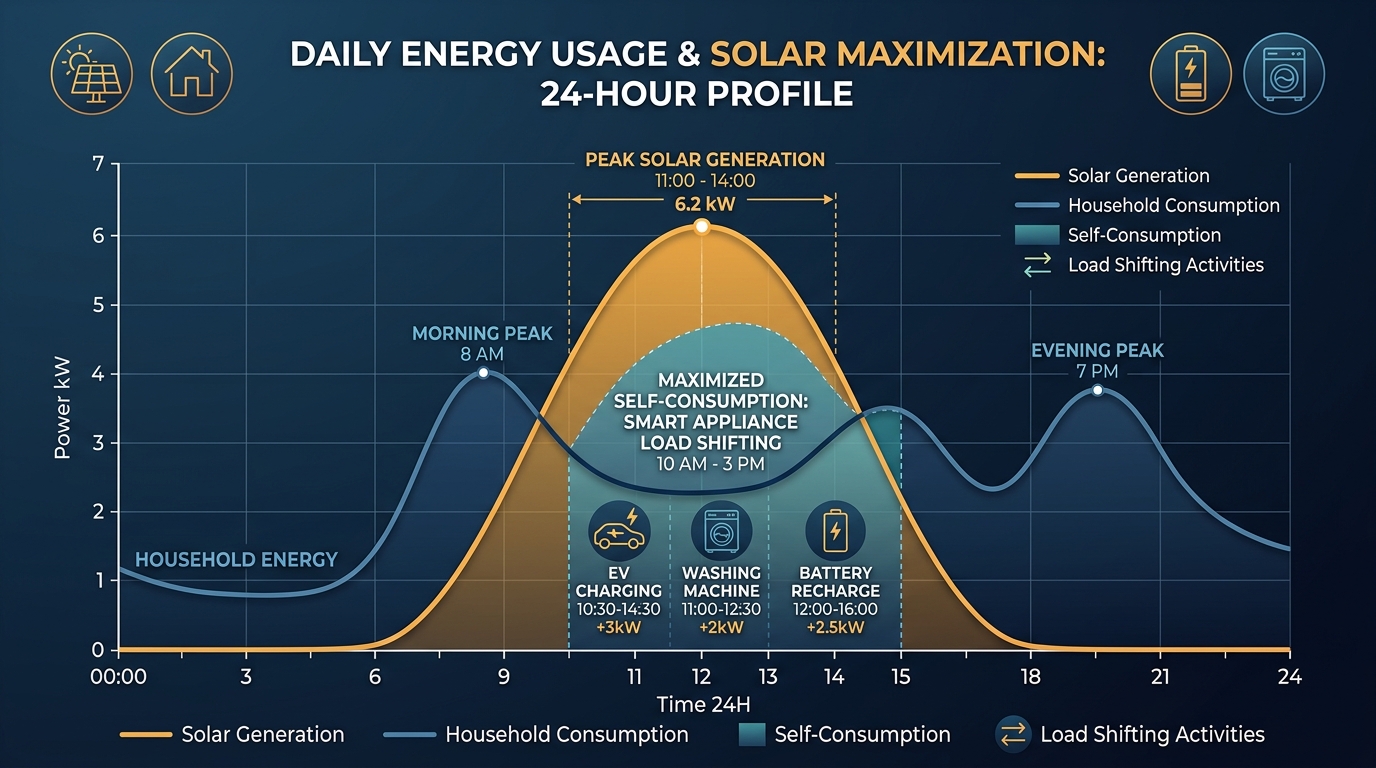
Understanding daily power generation curves allows you to shift heavy electrical loads into peak solar generation hours.
1. Shift High-Consumption Loads to Solar Noon
The most efficient battery is the one you do not have to cycle. Storing solar energy in a battery and converting it back out through an inverter introduces approximately fifteen to twenty percent round-trip efficiency losses.
Whenever possible, align heavy electrical demands directly with peak generation hours between 11:00 AM and 2:30 PM:
- Run washing machines, dehumidifiers, power tool battery chargers, and water pumps during midday hours.
- This direct self-consumption uses electricity instantaneously as photons strike the silicon cells, bypassing battery storage losses completely.
2. Automate Appliance Schedules with Smart Plugs
You do not have to stand by light switches to synchronize appliances with the sun. Using programmable smart plugs allows you to configure automated routines that activate devices only when solar harvest reaches sufficient thresholds.
To learn how to implement effortless automated timers, read our foundational guide: The Ultimate Guide to Smart Plugs: Automate, Save Energy, and Lower Your Bills. For apartment-specific recommendations, consult our review of the Best Smart Plugs for Apartments.
3. Conduct Seasonal Solar Tilt Adjustments
If your solar panels sit on adjustable ground mounts or balcony brackets, adjust their tilt angle twice a year:
- Summer Tilt Angle: Set the panel tilt to your latitude minus fifteen degrees. This flattens the panel, optimizing exposure to the high summer sun.
- Winter Tilt Angle: Set the panel tilt to your latitude plus fifteen degrees. This steep angle catches the low winter sun and helps snow slide off the glass surface effortlessly.
- This simple five-minute adjustment increases your total seasonal energy harvest by ten to fifteen percent.
4. Eliminate Baseline Parasitic Standby Loads
Every watt of standby power drained by idle electronics is a watt your solar panels must replace. Audio amplifiers, modern televisions, microwave display clocks, and computer peripherals constantly sip electricity even when powered off.
Before building an alternative energy system, conduct a thorough household audit using our walkthrough on How to Use a Kill A Watt Meter. Furthermore, our investigative guide on Vampire Power in Rentals provides an actionable playbook for eliminating hidden energy leaks across your living space.
The Economics of DIY Green Energy: Payback and Resilience
A common question among prospective alternative energy builders is: How long does it take for a DIY solar and wind system to pay for itself?
Calculating return on investment requires looking at two distinct balance sheets: direct utility savings and indirect disaster mitigation.
+--------------------------------------------------------------------------+
|                  ECONOMIC VALUE COMPARISON: DIY vs. GRID                 |
|                                                                          |
|  1. DIRECT UTILITY DISPLACEMENT (Self-Consumption)                       |
|     A 400W solar array harvesting 1.5kWh/day saves approx. $120 to $220   |
|     annually on standard residential electricity bills ($0.22-$0.40/kWh).|
|                                                                          |
|  2. EMERGENCY SPOILAGE & OUTAGE AVOIDANCE                                |
|     A single 48-hour winter blackout can spoil $400 to $800 of groceries |
|     and force expensive hotel stays. A DIY backup pays for itself in     |
|     one severe emergency event.                                          |
+--------------------------------------------------------------------------+
Self-Consumption vs. Traditional Utility Net Metering
In previous decades, residential solar owners relied heavily on Net Energy Metering (NEM), sending excess daytime electricity back into the utility grid in exchange for retail credits.
Today, utility commissions across the nation have restructured net metering tariffs (such as California NEM 3.0), drastically slashing the value of exported solar electricity by seventy to eighty percent while hiking peak retail electricity rates.
Under these modern rate designs, sending power back to the electric company is an economic dead end. True financial value lies in one hundred percent local self-consumption. By storing your own solar and wind energy in dedicated batteries and powering your own household loads, you avoid paying inflated retail rates and shield your family from fluctuating utility pricing brackets.
To analyze your local utility tariff tiers and spot billing surcharges, review our comprehensive guide on How to Read Your Apartment Electricity Bill.
Frequently Asked Questions
Can I build an off-grid solar setup if I rent an apartment?
Yes. Renters can deploy folding monocrystalline panels on private balconies, patios, or south-facing window ledges. When connected directly to a portable power station via specialized flat window-pass-through cables, you generate clean, independent electricity without drilling holes in exterior walls or violating lease agreements. For comprehensive renter strategies, consult The Ultimate Renter Energy Savings Guide.
How many solar panels do I need to run a refrigerator continuously?
To run a modern Energy Star kitchen refrigerator (consuming approximately 1,000 to 1,200 watt-hours per day) continuously, you need a minimum of 300 to 400 watts of monocrystalline solar panels paired with a 1,000Wh to 1,500Wh LiFePO4 battery bank. This provides enough daytime generation to run the refrigerator and fully recharge the battery to carry the load through overcast afternoons and nighttime hours.
Are residential micro wind turbines noisy?
Modern micro wind turbines utilizing aerodynamic composite nylon blades operate at very low noise levels, typically between 35 and 45 decibels at a distance of thirty feet. In most residential environments, the natural background sound of the wind blowing through nearby trees is louder than the acoustic rotation of the turbine blades.
Do solar panels produce electricity on cloudy or rainy days?
Yes, but at reduced capacity. Photovoltaic cells absorb diffuse light that penetrates through cloud layers. On an overcast day, a quality monocrystalline panel produces approximately ten to twenty-five percent of its rated maximum output. Pairing solar with an MPPT charge controller maximizes whatever diffuse light reaches the panel surface.
Can I mix solar panels and wind turbines on the same battery bank?
Yes. This is the definition of a hybrid renewable microgrid. However, you cannot connect wind turbines and solar panels to the exact same charge controller. Solar panels produce steady DC voltage, whereas wind turbines produce three-phase wild AC electricity that fluctuates with every gust. You simply install a dedicated solar charge controller for your panels and a dedicated wind charge controller for your turbine, connecting both controller outputs in parallel to the same battery terminals.
How long do monocrystalline solar panels last?
Quality monocrystalline panels feature no moving parts and degrade very slowly at approximately 0.5 percent per year. Most reputable manufacturers guarantee eighty percent of original power output after twenty-five years of continuous outdoor operation. In practical terms, panels installed today will continue producing clean electricity for thirty to forty years.
Final Verdict: Your Roadmap to Energy Independence
True energy independence is not an all-or-nothing proposition. You do not have to cut your utility drop wire or spend tens of thousands of dollars on complex commercial contractors overnight. Autonomy is built methodically, one layer at a time:
+--------------------------------------------------------------------------+
|                     THE STEP-BY-STEP FREEDOM BLUEPRINT                   |
|                                                                          |
|  STEP 1: Measure and Eliminate Waste                                     |
|  - Conduct a plugin power audit and eliminate phantom vampire loads      |
|  - Automate non-essential lighting and accessory switches                |
|                                                                          |
|  STEP 2: Establish Resilient Emergency Battery Storage                   |
|  - Acquire a durable LiFePO4 power station for indoor blackout security   |
|                                                                          |
|  STEP 3: Deploy Independent Alternative Generation                       |
|  - Start with a portable 100W or 200W solar kit                          |
|  - Add micro wind generation to cover nocturnal and winter storm periods |
|  - Scale storage capacity as your household budget permits               |
+--------------------------------------------------------------------------+
To take your very first step into reliable alternative energy, the Renogy 100 Watt 12V Starter Kit provides the definitive, expandable foundation for understanding photovoltaic power hands-on.
If zero-installation portability and rapid deployment are your top priorities, pairing the high-efficiency Renogy 200 Watt Portable Solar Panel with a dedicated battery storage generator ensures you can generate and store clean electricity anywhere the sun shines.
By understanding the physics of renewable power and investing in quality, durable hardware, you insulate your household against grid instability, lower your environmental footprint, and secure genuine energy independence for years to come.
Related reading
- Best DIY Balcony Solar Kits for Apartments and Renters
- Portable Power Stations: The Complete Buyer’s Guide for Home Backup and Off-Grid Living
- The Ultimate Guide to Smart Plugs: Automate, Save Energy, and Lower Your Bills
- The Ultimate Renter Energy Savings Guide
For detailed guidance on ethical product evaluation methodologies and testing standards, review our Editorial Policy.